

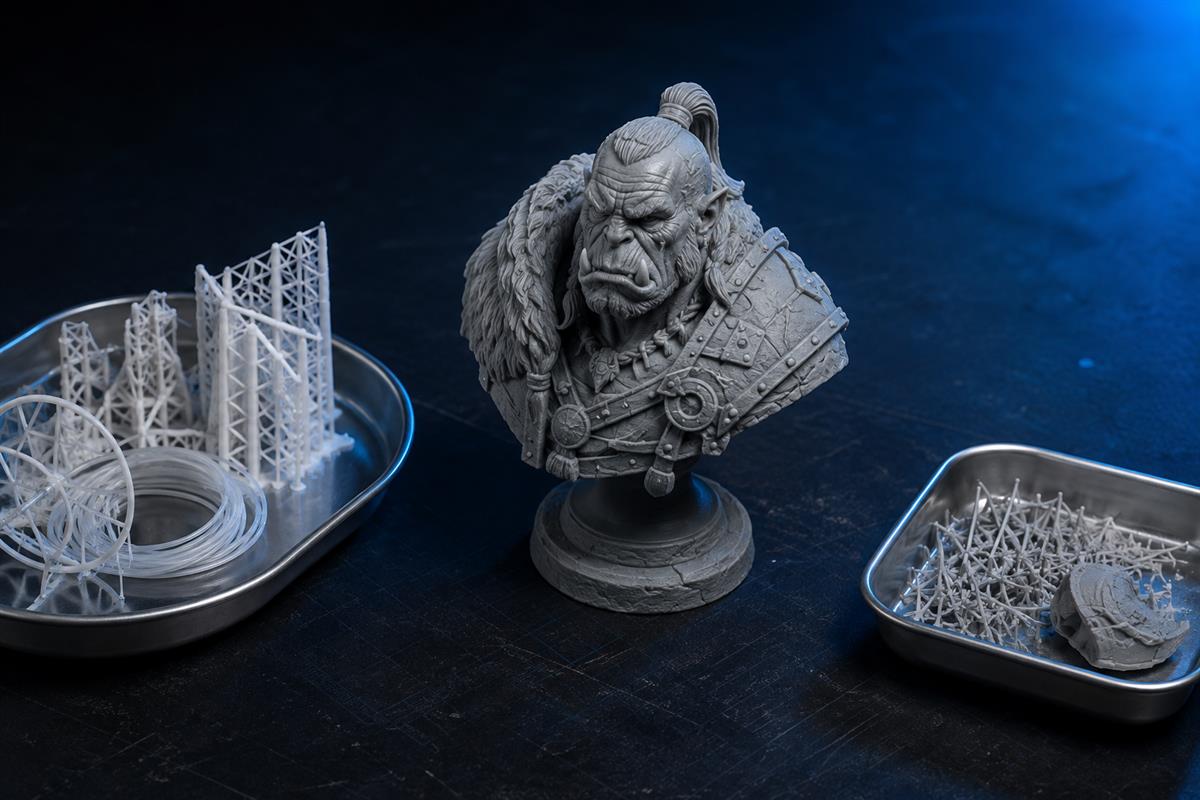
The most effective way to reduce 3d printing waste is to use less material for every successful, usable print. That means optimizing supports, removing unnecessary internal volume, recovering usable resin, and preventing failures before they turn a full build into scrap.
Material price alone misses much of the picture. An inexpensive spool can still produce bulky supports and a large pile of purge waste. A resin print can use delicate support contacts yet waste material through oversized rafts, trapped resin, or a failed batch. What matters is how much of your material ends up in parts you can actually use.
Place with purpose
Compare orientations and keep the anchors your model needs.
Use what matters
Hollow suitable parts and preserve usable liquid resin.
Validate, then batch
Approve one finished sample before filling the plate.
Where Does 3D Printing Material Get Wasted?
Separate useful material from process overhead. The model's necessary walls, infill, and structure serve a purpose. Supports, rafts, purge material, damaged parts, and avoidable cleanup losses are the first places to look for savings.
| Waste source | Typical cause | First action |
|---|---|---|
| Supports and rafts | Unhelpful orientation or excessive coverage | Compare orientations and review contact placement |
| Unnecessary internal material | Solid decorative parts or excessive infill | Hollow suitable resin parts; tune FDM walls and infill |
| Failed prints | Untested settings, poor adhesion, missing supports | Validate one sample before batching |
| Filament purge | Frequent single-nozzle color or material changes | Reduce changes and inspect purge estimates |
| Resin and wash losses | Spills, poor drainage, unnecessary transfers | Improve draining and handling routines |
Why Cheap FDM Filament Can Still Create Expensive Waste
FDM filament often has a lower purchase price per kilogram than printing resin, but that does not guarantee lower waste per finished model. For complex miniatures with deep overhangs, conventional FDM supports can occupy a substantial volume around the object. They may need broad interfaces under surfaces that a resin process can support through smaller, localized contact points.
On delicate details, those broad FDM interfaces can also be difficult to remove cleanly. If removal breaks a finger, ornament, or thin wall, the cost includes the discarded model as well as its supports. Resin supports can offer an advantage for suitable small, intricate models, although oversized resin tips or brittle materials can also damage parts.
This is a geometry-dependent comparison. Modern FDM organic or tree supports can reduce unnecessary structure, and some FDM models print without supports at all. Prusa documents organic supports as an alternative to its traditional grid approach. Compare both options in your slicer before judging material use.
Multi-color printing adds another waste stream
Single-nozzle multi-color or multi-material FDM printing can consume substantial filament while purging between changes. A small model with repeated color changes on many layers may create a disproportionate amount of discarded material. This is different from an ordinary single-color print, and tool-changing systems have different purging needs.
Reduce the number of changes, print separately colored components when assembly is practical, and use supported purge-into-infill or purge-object options where appearance and material compatibility allow. Never reduce purge volumes so far that contamination compromises the part. Prusa's wipe-tower documentation explains the purpose of purging and available waste-reduction options.
The useful comparison is total material consumed per accepted part. For a simple bracket, FDM may be extremely efficient. For a support-heavy miniature, a well-prepared resin workflow may use its supporting structure more effectively. Slice the same model at the same scale and include rejects before drawing a conclusion.
ACTION 01 / SUPPORTSReduce Support Waste Through Better Placement
Start by rotating the model and comparing the estimated material use. The best orientation balances support volume, surface quality, stability, and removal access. The shortest print or smallest support estimate is not automatically the most economical if it fails.

For resin prints
- Inspect the layer preview for unsupported islands and new cross-sections that need anchoring.
- Keep reliable anchors on the first features and heavier regions; use lighter contacts only where appropriate.
- Place contacts on accessible, less visible surfaces to reduce damage and finishing losses.
- Review raft size and model elevation. Excessive height creates longer supports, but preserve the clearance needed by your process.
- Change one support setting at a time and test before applying it to an entire batch.
Support structure and orientation work together. Removing supports without checking the layer sequence can leave geometry unable to form.
For FDM prints
Compare conventional and organic supports, use support painting or blockers carefully, and try placing a stable flat face on the bed. Split a model when the resulting assembly avoids a large support structure without compromising its purpose. Tune interface spacing for the material and geometry so that removal does not destroy the part.
Use a brim or raft when adhesion requires it. If the model prints reliably without one, removing that extra structure can save material across repeated jobs. Avoid indiscriminately lowering support density beneath broad surfaces that still need support.
ACTION 02 / RESINHollow Suitable Models and Recover Usable Resin
A large decorative bust does not always need a solid core. Hollowing can reduce resin consumption and printed mass, but the cavity must be accessible for draining, washing, drying, and adequate internal curing. A sealed shell full of uncured resin is not a successful material-saving result.
Choose wall thickness from your material's guidance and the part's size, loading, and handling needs. Add appropriately positioned openings that work in the printing orientation, inspect for isolated pockets and suction cups, and ensure internal supports can be managed. Small miniatures may save too little resin to justify the extra complexity.
Keep usable liquid resin in the workflow
Uncured resin left in a vat is not automatically waste. Follow the printer and resin manufacturer's storage instructions; keep it protected from light and contamination. If returning resin to storage is permitted, use a suitable clean, labeled container and filter as directed. Do not return resin contaminated with cleaning solvent or mix incompatible materials.
Allow excess resin to drain from the build plate and part into the approved collection area before washing. Use the manufacturer's recommended draining method, especially for hollow models. Fewer unnecessary transfers and spills mean less resin ends up on towels, gloves, and work surfaces.
Control cleaning consumables too
Where the material and wash equipment allow it, a first wash followed by a cleaner final rinse can help preserve the final bath. Keep containers covered between uses and replace wash liquid based on its documented working limits and cleaning performance. Extending a dirty bath beyond its useful life can leave residue and create rejects.
ACTION 03 / RELIABILITYPrevent Failed Prints Before Scaling Up
A failed build can erase the savings from many carefully trimmed supports. Validate a representative model with the intended material, settings, orientation, and post-processing before filling the plate.
- Check the file. Confirm dimensions, thin features, cavities, islands, and support coverage in the layer preview.
- Prepare the machine. Inspect the build surface and resin vat or FDM bed according to the maintenance instructions.
- Use a suitable profile. Start with a validated printer-material profile and the recommended operating conditions.
- Test the risky feature. A small fit coupon can validate a connector; a representative model is still needed to validate full-part support behavior.
- Inspect the finished result. Include support removal and final processing before calling the setup successful.
- Increase batch size gradually. Preserve spacing and check that the new plate layout remains reliable.
After a failure, identify the likely cause before rerunning the same file. A resin print stuck to the film requires the manufacturer's removal and inspection procedure before the next build. An FDM adhesion failure calls for checking the bed, first layer, material condition, and temperatures. Record what failed and change the relevant variable.
A full resin plate improves throughput only when it succeeds. One large untested batch can turn a small setup problem into a large material loss.
ACTION 04 / MEASUREMENTMeasure Material per Successful Print
Keep a simple job log: material consumed, support and raft estimate, purge estimate where relevant, failed attempts, and accepted part count. Compare similar jobs over several runs.
THE NUMBER TO TRACK
Material per accepted part
= total material consumed across all attempts
÷ number of accepted parts
For example, suppose a baseline process consumes 300 g to deliver ten accepted parts: 30 g per part. A leaner support setup consumes 260 g initially, but needs another 80 g of reprints to deliver ten accepted parts. Its result is 34 g per part. These are hypothetical figures, but they show why success rate belongs in a waste calculation.
For resin, exclude recoverable liquid still in the vat from consumed material. Use consistent units: convert volume to mass with the resin's stated density when necessary. Track cleaning fluid and other consumables separately. A smaller pile of supports alone does not establish lower total cost or environmental impact.
ACTION 05 / REMAINING WASTEHandle Remaining Waste Correctly
Keep liquid resin and resin-contaminated wash liquid out of drains, including water used for water-washable resin. Follow the material safety data sheet and local disposal requirements for liquids, cured solids, and contaminated consumables. Do not assume every cured resin item is accepted in household recycling.
Cured printing resin cannot simply be melted back into usable printing liquid. FDM scraps may be suitable for specialist recovery, but acceptance depends on the polymer and the service; keep materials separated if such a service is available. Preventing scrap is generally more practical than planning to recycle every failed print.
SAVE THIS FOR YOUR NEXT BUILD
Your Pre-Print Waste-Reduction Checklist
- Does the model need this scale, wall thickness, and internal fill?
- Have you compared at least two sensible orientations?
- Are supports concentrated where they are needed?
- Can hollow resin cavities drain and be fully processed?
- Have you checked FDM support, adhesion, and purge estimates?
- Has a representative sample survived the complete finishing workflow?
- Are the machine and material ready for a reliable run?
- Will you record consumption and accepted parts after printing?
Frequently Asked Questions
What is the fastest way to reduce 3D printing waste?
Fix recurring failures first, then optimize orientation and supports. Removing a few grams of support has little value if the resulting print has to be repeated.
Does FDM always waste more material than resin?
No. Support-heavy miniatures and frequent single-nozzle color changes can generate considerable FDM waste. Support-free FDM parts can be highly efficient. Resin has its own losses, including supports, rafts, trapped liquid, and cleaning consumables.
Should every resin model be hollow?
No. Hollowing is useful when the saved volume justifies the extra processing and the cavity can be properly drained, cleaned, and cured. Small or load-bearing parts may be better printed solid.
Can I reuse resin left in the vat?
Often, provided it remains suitable for use and the manufacturer's storage, mixing, and filtering instructions are followed. Resin with cured debris or solvent contamination needs appropriate handling before further printing.
Should I use the smallest possible supports?
Use the smallest support system that remains reliable for the job. Necessary anchors protect the entire print, so reducing them too aggressively can increase total waste.
Build a More Material-Efficient Workflow
To reduce 3d printing waste, improve the complete path from file to finished part. Choose an efficient orientation, use reliable supports, remove unnecessary internal volume, preserve usable resin, and validate settings before scaling up. Compare your results by material consumed per accepted print, and keep the changes that deliver consistent savings.
Share:
3D Printer Accuracy vs. Resolution: What's the Difference?
How to Print High Detail Miniatures: Complete Resin 3D Printing Workflow