

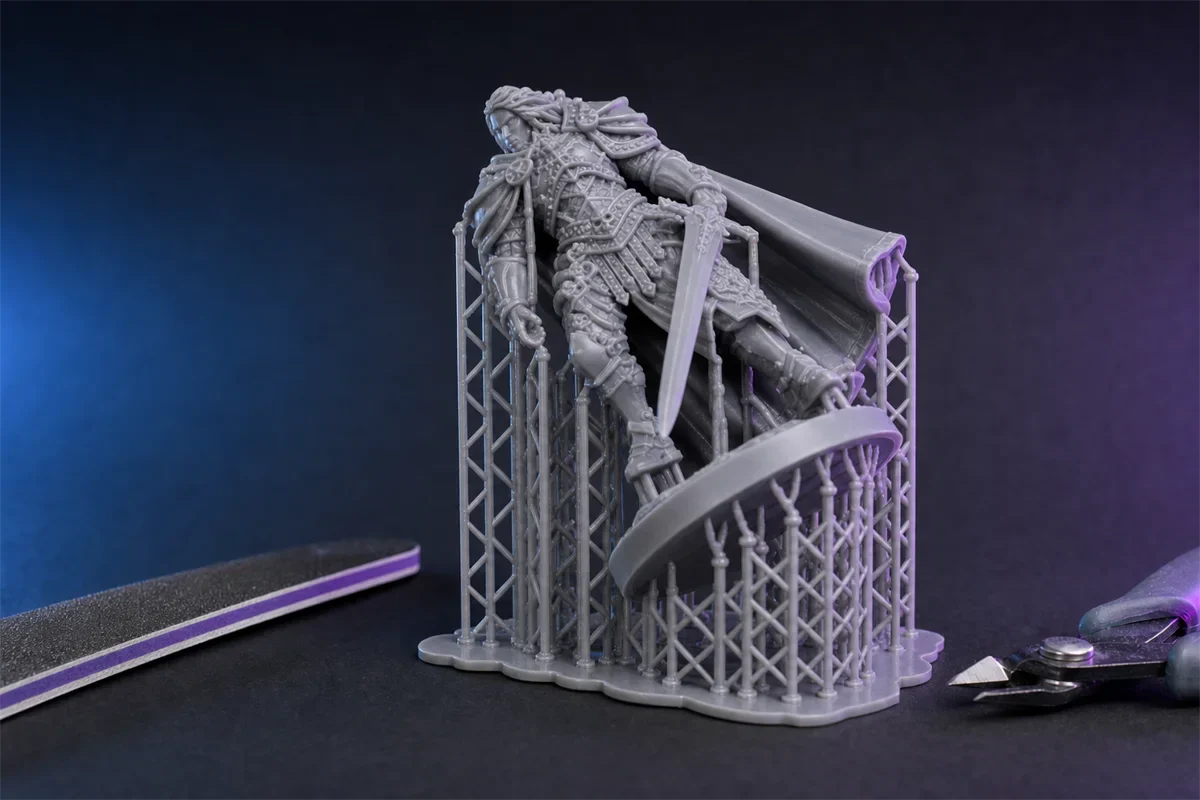
Cleaner painted miniatures begin before the first layer is printed. Thoughtful orientation, controlled contact points, strategic support placement, and careful removal can greatly reduce the pits, bumps, and torn surfaces that primer tends to reveal.
Support marks are one of the most common frustrations when preparing resin miniatures for painting. Even a highly detailed print can require considerable cleanup if support tips leave pits, bumps, or torn surfaces in visible areas.
The good news is that most support marks can be prevented—or at least greatly reduced—before printing begins. With thoughtful model orientation, well-placed supports, proper cleaning, and a careful removal process, you can achieve a smoother surface while preserving fine details.
Why Do Resin Supports Leave Marks?
During resin printing, supports hold the model in place and stabilize islands, overhangs, and delicate features. Each support must connect to the miniature at a small contact point. When it is removed, that point can leave behind:
- A raised nub
- A shallow pit
- A torn or chipped surface
- A rough patch that becomes visible after priming
- Damage to small details such as fingers, weapons, clothing, or facial features
The severity of these marks depends on support-tip size, placement, model orientation, resin properties, exposure settings, and the stage at which the supports are removed.
1. Choose the Right Model Orientation

Orientation is one of the most effective ways to reduce visible support marks. Instead of placing a miniature perfectly upright or flat on the build platform, tilt it backward and slightly to one side. The ideal angle varies by model, but the objective remains the same: keep support contacts away from the surfaces that viewers will notice first.
Good contact areas
- The back of the miniature
- The underside of clothing or armor
- The bottom of the base
- Hidden areas between components
- Surfaces that are easy to sand
Areas to avoid
- Faces and hair details
- Hands and fingers
- Weapon edges
- Decorative armor
- Smooth presentation surfaces
- Shallow engraved textures
Good orientation also reduces the cross-sectional area of each layer. This lowers peel forces during printing and may allow the model to print reliably with fewer heavy supports.
2. Use the Smallest Reliable Contact Points
Large support tips provide more holding strength, but they also tend to leave larger marks. For delicate miniatures, light supports with smaller contact points are usually preferable on detailed surfaces. Making every support extremely thin, however, can create another problem: print failure.
A practical approach is to use:
- Stronger supports around the first layers and major load-bearing areas
- Medium supports for structural overhangs
- Light supports for small islands and fine details
The goal is not simply to use fewer or thinner supports. It is to create an efficient support structure that provides adequate stability with the least possible contact damage.
3. Place Supports Strategically
Automatic supports can save time, but their quality depends heavily on the slicing software. Poorly generated supports may cluster on visible surfaces, use unnecessarily large contact points, or miss important islands.
When reviewing a supported model, look for unsupported islands, large flat overhangs, long or flexible parts, heavy clusters, contacts on important details, and supports that cross or trap delicate components. If manual adjustment is required, move contact points toward edges, corners, hidden recesses, and surfaces that are easy to access after printing.
It is often better to distribute several carefully sized supports across a structural area than to rely on one oversized contact point.
4. Remove Supports at the Right Time
Support removal is generally easier before final curing. Fully cured resin becomes harder and more brittle, which can cause support tips to snap abruptly and pull material away from the model.
- Remove the printed model from the build platform.
- Wash it according to the resin manufacturer's instructions.
- Allow excess cleaning liquid to drain or evaporate.
- Remove the supports carefully.
- Complete any required secondary cleaning.
- Let the model dry completely.
- Apply the final UV cure.
Safety reminder: Follow the instructions for your resin and cleaning liquid. Wear suitable gloves, work in a ventilated area, and keep alcohol away from heat, sparks, and open flames.
5. Use Warm Water Carefully When Appropriate
For compatible resins, briefly warming the supported model can soften thin supports and make them easier to remove. The supports may then separate with less force, reducing the risk of pits or broken details.
Do not use excessive heat, as this may deform thin parts or affect dimensional accuracy. Always check the resin manufacturer's recommendations first, especially when working with specialty materials.
6. Use the Right Removal Technique

- Hold the miniature by a strong, non-detailed area.
- Remove supports gradually, working from outer branches toward the main structure.
- Use flush cutters around fragile features.
- Apply pressure in the direction that places the least stress on the model.
- Never twist supports attached to swords, fingers, horns, or other thin parts.
If a support does not release easily, cutting it close to the surface is safer than forcing it off. The remaining nub can be removed during sanding.
7. Sand the Remaining Marks Before Priming
Even a well-supported print may have a few small contact marks. Start with a fine-grit sanding tool rather than an aggressive file. Depending on the surface and resin, you can progress through approximately 400-, 600-, and 800-grit sandpaper. Fine sanding sticks and small sanding sponges are especially useful for curved miniature surfaces.
For recessed or difficult areas, consider precision sanding sticks, small needle files, hobby knives or scrapers, and folded pieces of fine sandpaper. Sand gently and check the surface frequently: shallow sculpted textures can be flattened surprisingly quickly.
A thin coat of primer can reveal imperfections that were difficult to see on bare resin. If necessary, sand the area again and reapply primer before painting.
How HeyGears Blueprint Helps Minimize Support Marks

Many preparation steps can be simplified with well-designed printing software. HeyGears Blueprint is designed to connect pre-processing, printing, and post-processing. Its automated pre-processing workflow includes layout, support generation, and slicing, while its support approach uses structural analysis, lowest-point detection, intersection avoidance, support anchors, and support optimization.
For miniature creators, automation is especially valuable. Small figures often contain dense details, thin accessories, complex clothing, and organic surfaces. Protecting those features while supporting every island manually can be time-consuming. A controlled automatic support layout can reduce unnecessary contacts and make support placement more manageable.
After washing with the recommended cleaning alcohol, the support structure can generally be removed with relatively little effort. A small number of marks may still remain—as with any supported resin print—but minor contact points typically require only a quick pass with fine-grit sandpaper before priming.
Final Thoughts
A clean painted miniature begins long before the first coat of primer. Model orientation, support-tip size, contact placement, washing, removal timing, and sanding all influence the final surface quality.
For users preparing supports manually, careful planning can significantly reduce visible marks. For those who want a more streamlined workflow, HeyGears Blueprint provides automatic pre-processing and support generation intended to balance printability, structural stability, and manageable cleanup.
Once the model has been washed, remove the supports carefully and sand the few remaining contact points smooth. The result is a cleaner miniature, less preparation work, and more time to focus on painting.
Share:
32mm Miniatures: Why Detail, Supports, and Stability Matter
Batch Printing Miniatures: Print More With Fewer Failures