

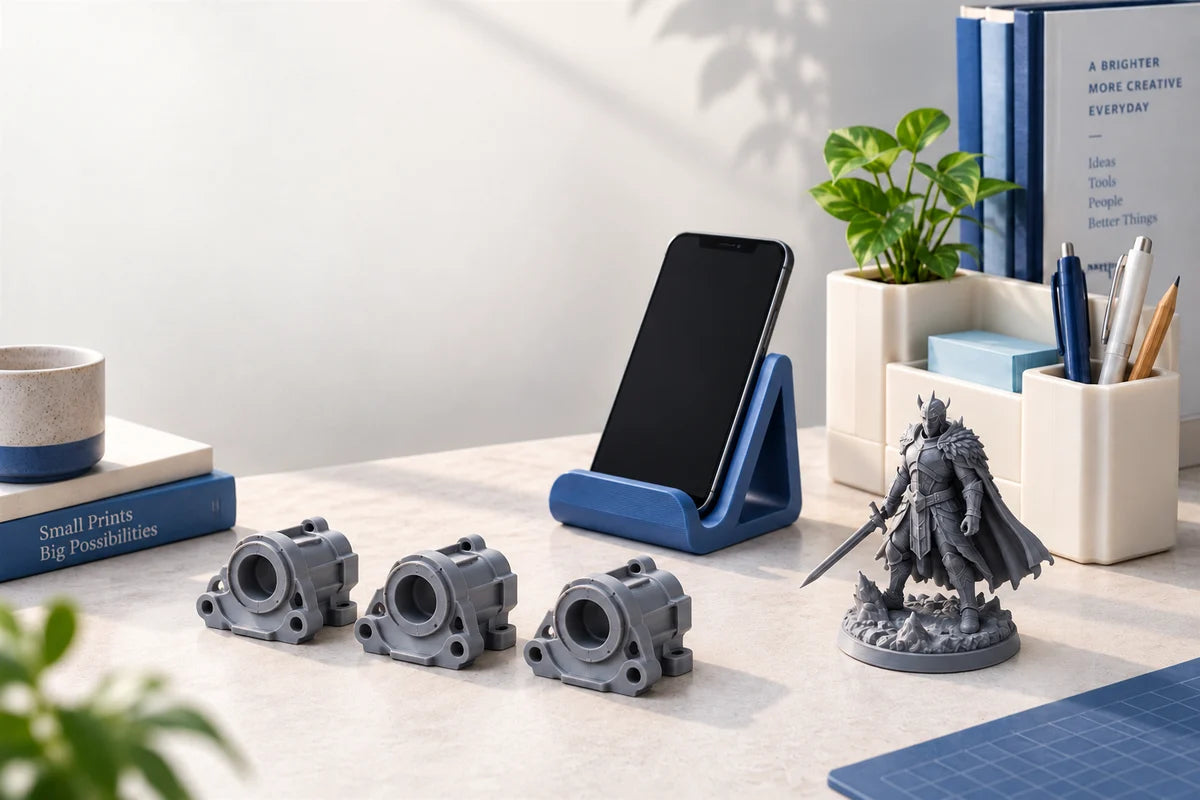
A good everyday 3D printer makes it straightforward to turn an idea into a usable object—and repeat the process tomorrow. Consistent results, manageable upkeep, and a workflow that fits your space matter just as much as impressive specifications.

If you are searching for the best 3d printer for everyday use, start with the things you plan to make and the effort you can realistically put into each session. The right choice should fit your routine from file preparation through cleanup.
The quick answer: Look for repeatable print quality, clear software, useful automation, suitable materials, a practical workspace footprint, accessible maintenance, and a realistic cost per successful print.
1. Start With What You Print Most Often
List three projects you expect to repeat: perhaps desk organizers, small product prototypes, or detailed miniatures. Their size, surface finish, and intended use give you a much better starting point than a headline resolution or maximum speed.
Filament printing is a common starting point for organizers, brackets, and larger practical objects. A resin 3D printer is worth considering when fine surface detail is central to the job, such as miniatures or small display models. Resin printing also brings washing and post-curing into the workflow. See the Prusa guide to printing technologies for an overview of the processes.
For parts that bend, carry a load, or face heat, check the material’s technical data and test the finished design. A visually accurate print does not automatically have the properties required for its intended use.
FDM vs. Resin vs. UV Printers: What Should You Make With Each?
The most useful comparison starts with the finished product. FDM and resin printers build three-dimensional objects from digital models. In this guide, UV printer means a direct-to-object UV inkjet printer, usually a flatbed machine, that adds graphics to an existing surface. Although many resin 3D printers also use UV light, they perform a different job.
| Technology | Well suited to | Less suited to / trade-offs |
|---|---|---|
| FDM / FFF Filament 3D printing |
Desk organizers, phone stands, storage trays, enclosures, jigs, larger terrain pieces, and practical prototypes. | Tiny faces, delicate miniature textures, and surfaces that must look smooth immediately after printing. Layer lines and support-contact areas may need finishing. |
| Resin SLA / MSLA / DLP |
Detailed tabletop miniatures, collectible figures, small display models, jewelry design prototypes, and fine-feature appearance prototypes. | Large basic storage items when detail is unimportant, projects needing minimal cleanup, and impact-loaded or repeatedly flexed parts made with an unsuitable standard resin. |
| UV inkjet Direct-to-object printing |
Full-color artwork and logos on compatible phone-case blanks, acrylic signs, coasters, plaques, and promotional products. | Creating a standalone bracket or figurine from scratch. Deep recesses, steep curves, and difficult-to-bond surfaces can require another process or special preparation. |
FDM: A Practical Starting Point for Larger, Useful Objects
If your routine involves organizing a workbench, making an enclosure, or checking the shape of a new design, start by evaluating FDM. Choose filament to match the job rather than assuming every plastic behaves alike. A decorative stand and a bracket exposed to heat have different requirements.
FDM can also produce miniatures, but very small features can demand a finer nozzle, careful orientation, and longer print times. For examples of that trade-off, see Prusa’s small-nozzle miniature guide. For functional designs, account for print orientation and layer bonding, and test the part under its intended loads.
Resin: A Strong Choice When Fine Detail Is the Priority
Choose a resin 3D printer when facial expressions, fine lettering, sculpted fabric, or small decorative features determine whether the result is successful. These are common priorities for miniature painters, model makers, and designers presenting small visual prototypes.
The trade-off is the complete handling and finishing routine: supports, washing, drying, and material-specific curing. Standard model resin is not automatically suitable for a spring clip, a dropped tool, or a hot environment. Tough, flexible, and other specialist resins can expand the applications, but their documented properties, printer compatibility, and curing requirements must match the design. Large simple parts can also make resin consumption and post-processing less attractive when fine detail adds little value.
UV Inkjet: Best Evaluated for Customizing Existing Products
A UV printer adds color and, on suitably equipped systems, white ink or raised clear-ink effects to an existing item. It can personalize a phone-case blank; it does not manufacture the case. Raised ink textures are surface decoration, not a substitute for building a structural 3D object.
Check adhesion on the actual blank. Glass, metal, or certain plastics may need primer or a different ink system. Cylindrical products may require a supported rotary attachment; irregular objects need suitable clearance and fixturing. Explore the HeyGears G1X UV printer for surface-customization applications. Its UV configuration focuses on surface printing; full-color 3D printing requires the additional accessories specified by HeyGears.
A simple way to choose: Need to make a desk organizer? Evaluate FDM. Need a finely sculpted miniature? Evaluate resin. Need a full-color logo on a ready-made organizer or gift? Evaluate UV inkjet. If you want to both build and decorate an object, plan two compatible processes and test the surface finish first.
2. Prioritize Repeatability Over One Perfect Print
A reliable 3d printer should give you a practical route to consistent results. Look for clearly documented setup procedures, supported material profiles, and troubleshooting guidance that explains what to check when something goes wrong.
When assessing sample prints or requesting a demonstration, ask to see several copies of the same model. Compare fit, visible defects, and the amount of finishing needed. A repeat test tells you more about an everyday workflow than a single carefully selected showcase piece.
Also consider recovery: How easy is it to identify a failed print, clean the machine, and start again? Downtime and repeated troubleshooting become frustrating when printing is part of your regular schedule.
3. Look for Software You Can Understand
An easy-to-use 3d printer begins with understandable preparation software. You should be able to import a model, check its size and orientation, choose a suitable material profile, inspect supports, and preview the job without guessing what each step does.
Useful features include readable warnings, clear print estimates, saved settings, and guidance that matches the actual software version. Automatic support generation can help, but you still need to review contact points and delicate features before printing.
Before buying, check software compatibility with your computer, supported file formats, and any account or network requirements. If you prefer local operation, confirm which steps work without an internet connection.

4. Choose Automation That Removes Repeated Work
An automated 3d printer is most useful when its features address tasks you would otherwise repeat every session. Depending on the machine, these may include leveling, material monitoring, refilling, or guided setup checks.
Ask exactly what a feature automates, when you still need to intervene, and whether it requires an accessory. Compare the number of manual steps in a normal print session instead of simply counting features on a product page.
Automation also has boundaries. You still need a suitable model, correct material selection, routine inspections, and appropriate post-processing. Look for a workflow that is easy to supervise and easy to understand when it needs attention.
5. Make Sure the Whole Workflow Fits Your Space
A desktop 3d printer needs more space than its listed footprint. Allow for opening the lid or door, removing parts, storing materials, and performing maintenance. Check the operating environment specified by the manufacturer, including temperature and ventilation requirements.
For resin printing, plan a dedicated area for washing, drying, curing, and handling tools. Use suitable gloves and eye protection, and follow the resin and cleaning solvent safety data sheets for ventilation, handling, and disposal.
Think about noise and daily access, too. A setup that interrupts your normal work or requires clearing the table every time may get used less often than you expect.
6. Compare Time to a Finished Part
Advertised print speed covers only part of the experience. For an everyday project, count preparation, machine setup, printing, part removal, finishing, and cleanup. Include time spent retrying a failed job when comparing your own results.
For resin parts, washing removes residual liquid resin, while post-curing requirements depend on the material and its intended properties. Follow the material-specific instructions, including drying before curing.
A useful comparison is to request the same model, at a comparable finish, on each printer you are considering. Record both elapsed time and the minutes of hands-on work. This helps you judge whether a machine fits an evening hobby session or a busy studio schedule.
7. Check Maintenance, Consumables, and Support
Before committing, read the maintenance guide and find the replacement parts you are likely to need. Check their price, local availability, and installation instructions. Depending on the technology, recurring items may include nozzles, build surfaces, resin tanks, release films, and cleaning supplies.
Material availability matters just as much. Verify which materials are supported, which have ready-to-use profiles, and which require your own testing. Factor in delivery time and storage requirements if you plan to print regularly.
For budgeting, compare the total cost of your expected workflow: equipment, any required accessories, materials, consumables, maintenance, and waste from supports or failed attempts. Divide recurring costs by the number of usable parts produced to estimate a practical cost per successful print.
A Practical Checklist Before You Buy
| What to evaluate | What to ask or check |
|---|---|
| Your typical projects | Will your regular models fit, with room for orientation and supports? |
| Repeatability | Can you inspect several copies of a representative part? |
| Ease of use | Are setup, software, and troubleshooting instructions clear? |
| Automation | Which manual steps disappear, and which accessories are required? |
| Daily workflow | Do you have the space and time for printing, finishing, and cleanup? |
| Ongoing ownership | Are suitable materials, spare parts, and support readily available? |
Explore the HeyGears Reflex RS Turbo
If your everyday projects focus on detailed miniatures, collectibles, or small prototypes, the HeyGears Reflex RS Turbo is an option to consider. Its official product page lists Floating Screen Auto Leveling and Automatic Resin Refill among its assisted-printing features. Automatic resin heating requires the separately purchased RS Heated & Pulsing Release Resin Tank.
Review the available configurations and compatible materials against your own checklist, including the washing and curing workflow. The best everyday choice is one you can use consistently, maintain confidently, and fit into your routine.
Share:
How to Make 3D Prints Stronger: Materials, Design, and Printing Settings?
Best Resin 3D Printer for Miniatures: What Makes a Printer Stand Out in 2026?