Es gibt kaum einen frustrierenderen Moment beim 3D-Druck als den 12-Stunden-Druckfehler. Voller Vorfreude kehrt man zum Drucker zurück und findet nur ein verzogenes, zerfetztes Teil vor – oder schlimmer noch: eine komplett saubere Bauplatte. Für Einsteiger wie für erfahrene Profis sind Probleme beim Harz-3D-Druck (SLA/DLP/LCD) besonders ärgerlich, da der Fehler oft unbemerkt im Harzbehälter auftritt.
Aber es gibt auch gute Nachrichten: Harzdruck ist kein Hexenwerk. Er ist eine präzise Wissenschaft, ein sensibles Zusammenspiel von Licht, Haftung und Kraft. Jeder Fehldruck ist weit mehr als nur Zeit- und Harzverschwendung – er liefert wichtige Daten. Ihre Maschine zeigt Ihnen damit genau, welche Variable außerhalb der Toleranz liegt.
Dieser umfassende Leitfaden geht über einfache Tipps hinaus und bietet einen professionellen, detaillierten Rahmen für die Diagnose und Behebung der häufigsten Fehler beim Harzdruck.
Problem Nr. 1: Der Druck haftet nicht an der Bauplatte
Dies ist der häufigste und endgültigste Fehler: Der Druckvorgang startete gar nicht erst. Die Verbindung zwischen den ersten Schichten und der FEP-Folie war stärker als die Verbindung zur Bauplatte. Die Bauplatte löste sich ab, der Druck blieb jedoch an Ort und Stelle.
Ursache & Lösung: Unzureichende Belichtungszeit der unteren Schicht
Das Problem:
Die untersten Schichten (typischerweise die ersten 5–10 Schichten) bilden die Grundlage Ihres gesamten Drucks. Ihre Aufgabe ist es, eine Verbindung mit der Mikrostruktur der Bauplatte herzustellen. Dazu werden sie absichtlich überbelichtet. Ist die Belichtungszeit der unteren Schichten zu kurz, ist diese Verbindung schwach, und die Saugkraft der FEP-Folie (auch als Schälkraft bekannt) setzt sich durch und löst die neue Schicht von der Platte.
Die Lösung:
Erhöhen Sie die Belichtungszeit für die Unterseite in den Einstellungen Ihres Slicers. Dies ist ein entscheidender Faktor. Bei modernen Monochrom-Sieben liegt diese Zeit oft zwischen 25 und 40 Sekunden. Bei älteren Farbsieben kann sie 60 bis 90 Sekunden betragen. Erhöhen Sie diesen Wert in 5-Sekunden-Schritten, bis Sie eine gleichmäßige Haftung erreichen.
Ursache & Lösung: Falsche Z=0-Nivellierung (Bauplatte ist zu hoch)
Das Problem:
Die Bezeichnung „Nivellierung“ eines Harzdruckers ist etwas irreführend. Tatsächlich geht es darum, die „Z=0“-Position einzustellen – den präzisen, mikroskopisch kleinen Abstand zwischen Bauplatte und LCD-Bildschirm. Ist dieser Abstand zu groß (d. h. die Bauplatte ist zu hoch), wird das UV-Licht der ersten Schicht zu stark gestreut und unscharf. Das Harz wird nicht ausreichend verdichtet und härtet nicht zu einer festen, verbundenen Schicht aus, wodurch es stattdessen an der FEP-Folie kleben bleibt.
Die Lösung:
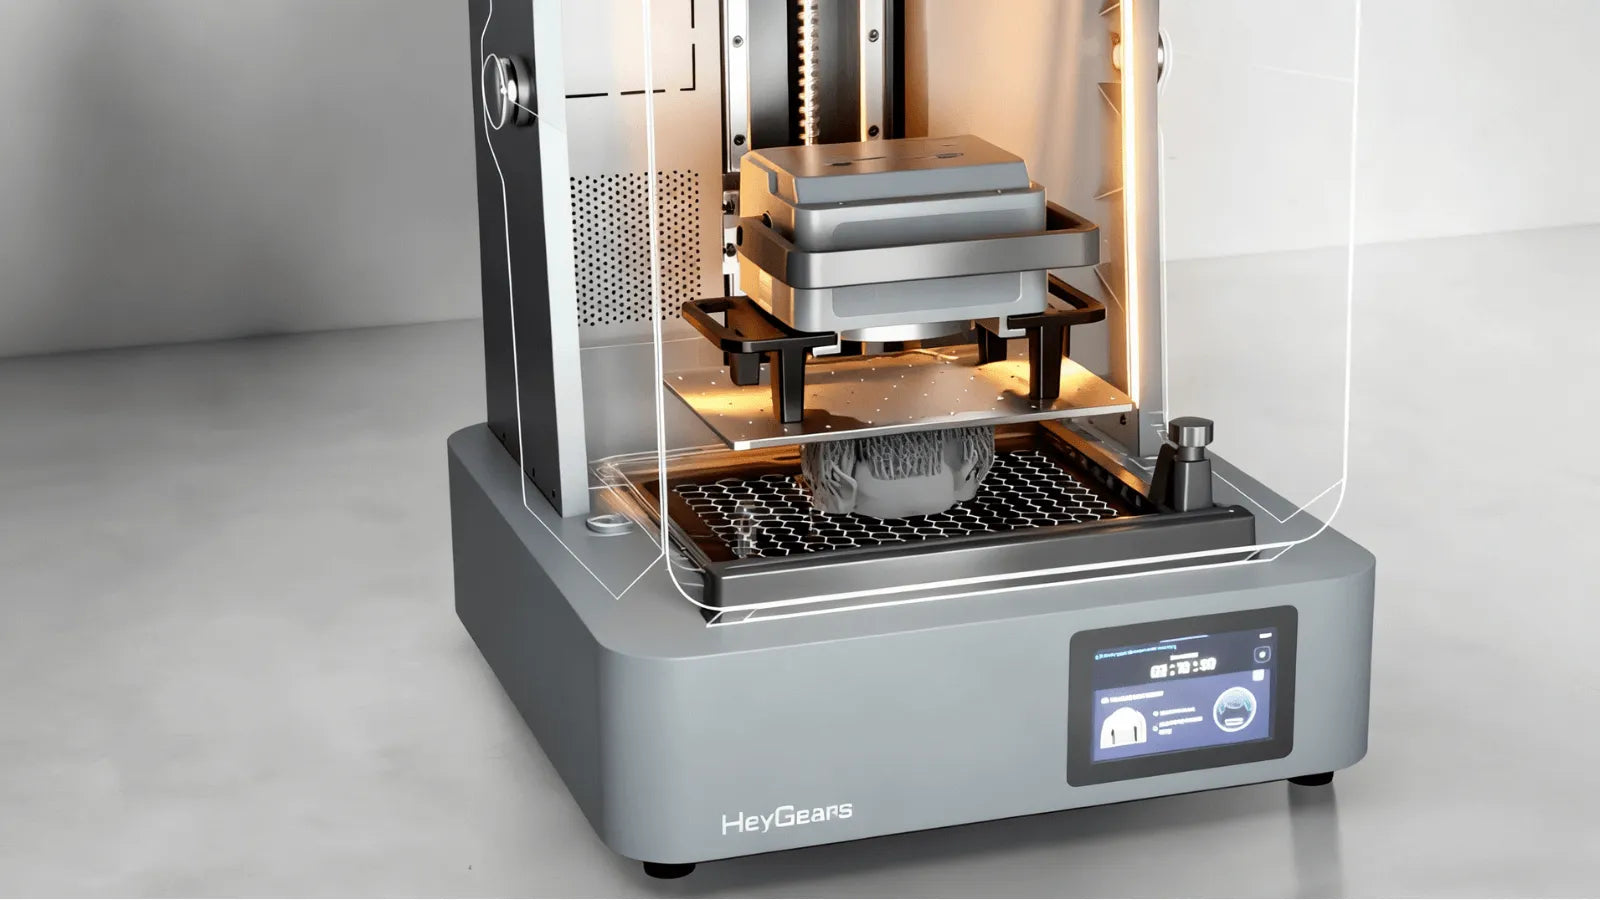
Richten Sie Ihre Bauplatte sorgfältig neu aus. Befolgen Sie die genauen Anweisungen des Herstellers. Diese beinhalten in der Regel das Lösen der Platte, das Aufsetzen auf ein Blatt Papier oder eine Nivellierkarte, das Andrücken mit leichtem Druck und das Festziehen der Schrauben in einem Sternmuster. Dieser Vorgang ist zwar unerlässlich, kann aber der frustrierendste Teil des Hobbys sein. Das ist ein Hauptgrund dafür, dass Drucker der nächsten Generation wie der Die HeyGears Reflex2 3D-Drucker sind mit automatischen Nivellierungssystemen und intelligenten Sensoren ausgestattet, die diese Variable vollständig eliminieren und jedes Mal einen perfekten Z=0-Abstand gewährleisten.

Ursache & Lösung: Die Oberfläche der Bauplattform ist zu glatt oder zu verschmutzt.
Das Problem:
Ihre Bauplatte benötigt eine gewisse Oberflächenstruktur – eine Mikrotextur, damit das ausgehärtete Harz haften kann. Ist Ihre Platte brandneu und poliert, ist sie möglicherweise zu glatt. Häufiger jedoch, wenn Sie sie bereits berührt haben, kann ein dünner, unsichtbarer Hautfettfilm als starkes Trennmittel wirken und jegliche Haftung verhindern.
Die Lösung:
Die Bauplattformen von HeyGears sind so konstruiert, dass sie eine zuverlässige Haftung ohne manuelle Oberflächenbearbeitung gewährleisten. Die Drucker der Reflex-Serie verfügen über eine perforierte Bauplatte, die die Haftung der ersten Schicht verbessert und den Druckvorgang beschleunigt. Die Modelle RS und RS Turbo hingegen nutzen eine speziell strukturierte, nicht perforierte Oberfläche, die denselben Effekt erzielt. Um eine optimale Haftung zu gewährleisten, reinigen Sie die Plattform vor jedem Druckvorgang einfach mit hochkonzentriertem Isopropylalkohol (IPA) und einem fusselfreien Tuch. Schleifen oder eine zusätzliche Oberflächenbehandlung ist nicht erforderlich – die Geometrie der Plattform selbst sorgt für die notwendige Haftung.
Problem Nr. 2: Druck löst sich während des Druckvorgangs von den Stützstrukturen.
Dieses Versagen ist struktureller Natur. Das Fundament (die Stützen) hielt, aber das Gebäude (das Modell) wurde abgerissen. Auch hier kämpfen Kräfte gegeneinander: die Schälkraft der FEP-Folie gegen die Zugfestigkeit der Stützspitzen.
Ursache & Lösung: Die Stützspitzen sind zu dünn oder nicht dicht genug.
Das Problem:
Die Kontakttiefe bzw. der Spitzendurchmesser Ihrer Stützstrukturen ist der entscheidende Schwachpunkt. Dieser winzige, ausgehärtete Harzstift hält Ihr Modell, während es wiederholt vom FEP-Drucker gezogen wird. Ist diese Spitze zu klein oder zu schwach, wird das Modell von der Stützstruktur abgerissen, und die Stützstrukturen lösen sich in Luft auf.
Die Lösung:
Verstärken Sie die Stützverbindungen. Suchen Sie in Ihrem Slicer die Einstellungen für „Kontakttiefe“ oder „Spitzendurchmesser“ und erhöhen Sie diese. Ein Sprung von beispielsweise 0,2 mm auf 0,35 mm kann über Erfolg oder Misserfolg entscheiden. Sie erhalten zwar eine etwas größere Schleifspur für die Nachbearbeitung, aber ein erfolgreicher Druck mit einigen kleinen Fehlern ist immer noch besser als ein Fehldruck. Stellen Sie außerdem sicher, dass die „Stützdichte“ für die Geometrie des Bauteils ausreichend hoch ist.
Ursache & Lösung: Die Hubgeschwindigkeit ist für den Querschnitt zu hoch.
Das Problem:
Die Schälkraft ist nicht konstant. Sie hängt direkt von zwei Faktoren ab: der Anhebegeschwindigkeit und der Querschnittsfläche. Je schneller Sie anheben und je größer die Oberfläche der abgezogenen Schicht ist, desto höher ist die Kraft. Bei einem großen, schweren Modellteil kann eine hohe Anhebegeschwindigkeit wie das Abreißen eines Verbandes wirken und einen massiven Kraftstoß erzeugen, der die Stützspitzen abbrechen lässt.
Die Lösung:
HeyGears Harz-3D-Drucker steuern die Z-Achsen-Bewegung mithilfe des Dynamic Motion Algorithm 3.0, der die Hubgeschwindigkeit automatisch in Echtzeit anpasst. Anstatt auf feste oder benutzerdefinierte Einstellungen zu setzen, analysiert das System die Querschnittsfläche jeder Schicht und die geschätzte Ablösekraft und optimiert die Z-Achsen-Geschwindigkeit entsprechend. Diese adaptive Steuerung minimiert plötzliche Kraftspitzen und gewährleistet eine gleichmäßige Trennung zwischen der ausgehärteten Schicht und der Folie. So behalten selbst große oder komplexe Modelle während des gesamten Druckprozesses ihre strukturelle Stabilität.

Problem Nr. 3: Schichttrennung oder „Rafting“
Hierbei handelt es sich um Delamination. Der Druckvorgang verlief zunächst erfolgreich, doch an einer bestimmten Stelle konnte sich eine neue Schicht nicht mehr mit der direkt darunter liegenden Schicht verbinden. Dies führt zu einem katastrophalen Strukturversagen.
Ursache & Lösung: Hohe Saugkräfte (Schröpfbildung) ohne ausreichende Drainage
Das Problem: Dies ist die Hauptursache für Delamination. Beim Drucken eines Hohlmodells (z. B. einer Büste oder einer Tasse) ohne Abflusslöcher entsteht ein „Saugnapf“. Während des Druckvorgangs sammelt sich Harz in diesem Hohlraum. Mit jedem Anheben entsteht ein starkes Vakuum gegen die FEP-Folie, wodurch enorme Ablösekräfte entstehen – so stark, dass das Druckobjekt horizontal in zwei Hälften gerissen werden kann.
Die Lösung:
Fügen Sie jedem hohlen Modell mindestens zwei Ablauf-/Belüftungslöcher hinzu . Platzieren Sie ein Loch so nah wie möglich an der Bauplatte und ein weiteres am gegenüberliegenden Ende. Das untere Loch dient als Entlüftung, lässt Luft einströmen und das Vakuum aufheben, wodurch die Saugkraft reduziert wird. Durch das obere Loch kann flüssiges Harz während des Druckvorgangs ablaufen.
Ursache & Lösung: Längeres Anhalten des Druckvorgangs
Das Problem: Wird ein Druckvorgang für 20 Minuten oder länger unterbrochen, setzt sich das Harz im Harzbehälter ab. Pigmente können sich verteilen und die Temperatur kann sich verändern. Beim Fortsetzen des Druckvorgangs verbindet sich die neue, frisch gemischte Schicht möglicherweise nicht richtig mit der dazwischenliegenden, „abgestandenen“ Schicht, was zu einem sauberen horizontalen Bruch führt.
Die Lösung: Vermeiden Sie nach Möglichkeit das Unterbrechen des Druckvorgangs. Sollten Sie dennoch unterbrechen müssen, rühren Sie das Harz im Behälter vorsichtig und langsam mit einem Kunststoffspatel um, um es vor dem Fortsetzen wieder zu vermischen. Gehen Sie dabei sehr vorsichtig vor, um die FEP-Folie nicht zu beschädigen.
Ursache & Lösung: Ein defekter LCD-Bildschirm oder eine defekte UV-Lichtquelle
Das Problem: Es handelt sich um einen Hardwaredefekt. Ihr LCD-Bildschirm (der das UV-Licht abschirmt) oder die UV-Lichtquelle selbst könnte defekt sein. Wenn die Lichtquelle flackert oder ein Teil des LCD-Bildschirms ausfällt, kann keine vollständige Schicht ausgehärtet werden. Der Druckvorgang wird zwar fortgesetzt, basiert aber auf einer schwachen, unvollständigen Grundlage, die dann reißt und sich ablöst.
Die Lösung: Führen Sie einen Bildschirmtest durch (oft auch „Tankreinigung“ oder „Belichtungstest“ genannt). Entfernen Sie den Harzbehälter und die Bauplatte und führen Sie den Test durch (decken Sie den Bildschirm mit einem Blatt Papier ab, um Ihre Augen zu schützen). Sie sollten ein scharfes, helles und gleichmäßiges Lichtrechteck sehen. Wenn Sie Flimmern, Pixelfehler oder dunkle Bereiche feststellen, ist Ihr Bildschirm defekt und muss ausgetauscht werden. Bei älteren Geräten kann dies ein Hinweis darauf sein, dass es Zeit für ein neues Gerät ist. Harz-3D-Drucker mit einem modernen, langlebigen Monochrom-Bildschirm und einer leistungsstärkeren, gleichmäßigeren Lichtquelle.
Problem Nr. 4: Verzerrte, aufgeblähte oder ungenaue Abmessungen
Ihr Ausdruck ist fertig, aber die Qualität ist schlecht. Scharfe Kanten wirken abgerundet, und feine Details gehen verloren. Das ist ein Präzisionsproblem.
Ursache & Lösung: Überbelichtung, Lichtaustritt und überschüssiges Aushärten von Harz
Das Problem:
Dies ist die häufigste Ursache für Detailarmut und das sogenannte „Aufblähen“ des Modells. Ihre Belichtungszeit ist zu hoch. UV-Licht ist kein perfekter, laserdünner Punkt; es dringt in das Harz um die Zielpixel herum ein. Diese Lichtstreuung härtet eine geringe Menge zusätzliches Harz aus, wodurch das Modell aufbläht, scharfe Ecken abgerundet und kleine Löcher verschlossen werden.
Die Lösung:
Im HeyGears-System ist jedes Harzmaterial mit einer vorkalibrierten 3D-Druckstrategie verknüpft – einem Prozessprofil, das die optimale Belichtungsenergie, Abzugsgeschwindigkeit und Aushärtungsparameter für die einzelnen Schichten definiert. Dadurch erhält jede Schicht genau die für eine präzise Polymerisation erforderliche UV-Energiemenge. So erhalten Anwender Drucke mit gestochen scharfen Oberflächendetails und stabiler Maßgenauigkeit, ohne das üblicherweise mit manueller Belichtungseinstellung verbundene Ausprobieren.
Ursache & Lösung: Modell nicht korrekt ausgehöhlt, wodurch Innendruck entsteht
Das Problem:
Du hast dein Modell ausgehöhlt, aber keine Ablauflöcher hinzugefügt (ein häufiges Problem!). Beim Aushärten des verschlossenen, hohlen Teils in einer UV-Nachhärtungsstation erhitzen sich das eingeschlossene flüssige Harz und die Luft und dehnen sich aus. Dieser Druck von innen führt dazu, dass sich die Wände des Drucks aufblähen und verziehen, wodurch die Maßgenauigkeit verloren geht.
Die Lösung:
Ablauflöcher. Wie in Problem Nr. 3 erläutert, sind sie für Hohldrucke unerlässlich. Sie ermöglichen das Ausspülen des nicht ausgehärteten Harzes im Inneren und sorgen für einen Druckausgleich während der Nachhärtung.
Ursache & Lösung: Unsachgemäße Nachhärtungstechnik
Das Problem:
Ihr Druck sah nach dem Waschen perfekt aus, hat sich aber beim abschließenden Aushärten verzogen. Das passiert oft, wenn das Teil nicht gründlich gewaschen wurde und ein Film aus nicht ausgehärtetem Harz auf der Oberfläche zurückbleibt. Beim Aushärten schrumpft dieser Film und zieht und verdreht dabei das Teil.
Die Lösung:
Gehen Sie beim Waschen sorgfältig vor. Verwenden Sie ein zweistufiges Waschverfahren: ein „schmutziges“ Bad mit Isopropanol (IPA), um den Großteil des Harzes zu entfernen, gefolgt von einem „sauberen“ Bad, um den letzten Film zu entfernen. Verwenden Sie eine weiche Bürste und Druckluft, um sicherzustellen, dass alle flüssigen Harzreste aus Spalten entfernt sind, bevor Sie mit der endgültigen Aushärtung beginnen.
Problem Nr. 5: Löcher, Einstiche oder „Reifenplatzer“
Hierbei handelt es sich um katastrophale Strukturversagen an einem bestimmten Punkt.
Ursache & Lösung: Die dringende Notwendigkeit von Entwässerungs-/Belüftungslöchern in Hohlmodellen
Das Problem:
Dies ist die dritte und gravierendste Folge fehlender Ablauflöcher. Es handelt sich hierbei weder um Sog (Problem Nr. 3) noch um Druck (Problem Nr. 4), sondern um hydraulischen Druck . Beim Absenken des hohlen, verschlossenen „Bechers“ in den Harzbehälter wird das nicht ausgehärtete Harz im Inneren eingeschlossen. Die Bauplatte drückt nach unten, und dieser hydraulische Druck wird so immens, dass er die schwächste Stelle heraussprengt und die Modellwand durchsticht.
Die Lösung:
Wie schon zuvor sind Ablauf-/Belüftungslöcher die einzige Lösung. Sie ermöglichen es dem Harz, während des Druckvorgangs frei ein- und auszufließen, gleichen den Druck aus und verhindern so ein Ausblasen.
Ursache & Lösung: Eingeschlossene Luft oder Verunreinigungen auf der FEP-Folie
Das Problem:
Ein kleiner, ausgehärteter Harzrest von einem vorherigen Defekt oder auch eine große, hartnäckige Luftblase kann zwischen der FEP-Folie und der neuen Schicht eingeschlossen werden. Dadurch wird das UV-Licht an dieser Stelle blockiert, wodurch ein einzelnes, lokal begrenztes Loch entsteht.
Die Lösung:
Filtern Sie Ihr Harz nach jedem Fehldruck durch ein Feinsieb – eines der wichtigsten Werkzeuge beim 3D-Druck . Dadurch werden ausgehärtete Harzreste entfernt. Sollten Sie hartnäckige Blasen bemerken, streichen Sie diese vor dem Druckstart vorsichtig mit einem Kunststoffspatel an den Rand des Harzbehälters.

Häufig gestellte Fragen zur Schnellbehebung anderer Probleme beim Harzdruck
Wie kann ich feine vertikale Linien auf meiner Druckoberfläche beseitigen?
Hierbei handelt es sich um Linien entlang der Z-Achse, die oft durch ein mechanisches Problem namens „Z-Wobble“ verursacht werden, oder um Schichtlinien .
Lösung: Reinigen und schmieren Sie die Gewindespindel Ihrer Z-Achse. Stellen Sie sicher, dass der Drucker auf einer stabilen, ebenen Fläche steht.
Warum haften meine Drucke zu stark an der Bauplatte?
Dies ist das Gegenteil von Problem Nr. 1. Ihre "Untere Belichtungszeit" ist so hoch, dass der Druck mit der Platte verschmilzt und nur mit Hammer und Meißel entfernt werden kann.
Lösung: Verringern Sie die Belichtungszeit für den unteren Bereich in 5-Sekunden-Schritten, bis sich der Druck (mit etwas Mühe) mit einem Kunststoffschaber entfernen lässt.
Können altes oder schlecht gemischtes Harz Druckprobleme verursachen?
Absolut. Harz ist ein photochemischer Verbundwerkstoff. Im Laufe der Zeit (6-12+ Monate) können sich die Komponenten trennen und Pigmente können sich absetzen.
Lösung: Schütteln Sie das Harz vor jedem Druckvorgang 1–2 Minuten lang kräftig . Ist das Harz älter als ein Jahr oder wurde es unsachgemäß gelagert (z. B. durch Sonnenlicht oder extreme Temperaturen), ist es möglicherweise abgelaufen und sollte ersetzt werden.
Fazit: Ein proaktiver Ansatz für makellose Harzdrucke
Wie Sie sehen, lässt sich nahezu jedes Problem beim 3D-Druck mit Harz diagnostizieren, verstehen und lösen. Erfolg ist keine Glückssache, sondern das Ergebnis eines proaktiven, ganzheitlichen Arbeitsablaufs.
Durch die Kalibrierung der Belichtung, die Beherrschung der Stütz- und Ausrichtungseinstellungen Ihres Slicers und die optimale Pflege Ihrer Hardware und Ihres Harzes wechseln Sie von einer reaktiven zu einer proaktiven Vorgehensweise . Sie hören auf, Fehler zu beheben, und beginnen, Ihre Kreationen zu perfektionieren.
Mit diesem Leitfaden sind Sie bestens gerüstet, um diese häufigen Probleme zu meistern. Alles Weitere, was Sie zur Weiterentwicklung Ihrer Fähigkeiten benötigen – von Hochleistungsharzen bis hin zu intelligenter 3D-Druckhardware der nächsten Generation – finden Sie bei [Name des Unternehmens/der Website]. HeyGears-Shop .
Teilen:
Vom Prototyping zur Serienproduktion: Die Leistungsfähigkeit des großformatigen 3D-Drucks mit Reflex 2 Pro
Erreichen Sie höchste Präzision mit den Black Friday 3D-Druck-Angeboten von HeyGears