
Vat photopolymerization, the technology family more commonly known as resin 3D printing, represents a revolutionary category of additive manufacturing. It is renowned for its capacity to produce physical objects with exceptional detail, intricate geometries, and remarkably smooth surface finishes, qualities that often surpass those of other 3D printing methods. The process is fundamentally transformative, converting a liquid photopolymer resin into a solid, three-dimensional object through the highly precise and controlled application of light. This guide provides a comprehensive exploration of how resin 3D printing works, delving into the foundational science of photopolymerization, the intricate mechanics of the hardware, the critical end-to-end workflow, and the key technological variants that define the modern landscape of high-resolution manufacturing.
The Core Principle: Understanding Photopolymerization
At the heart of every resin 3D printer lies a fundamental chemical process: photopolymerization. This is the scientific principle that makes the entire technology possible. In essence, photopolymerization is a process where light energy, typically in the ultraviolet (UV) spectrum, is used to initiate a rapid chain reaction. This reaction converts simple liquid molecules into complex, interconnected solid polymer networks, effectively turning a liquid into a solid with surgical precision. All forms of resin 3D printing, from Stereolithography (SLA) to Digital Light Processing (DLP), are built upon this core principle of light-activated curing.

What is Photosensitive Resin? The Magic of Liquid-to-Solid Transformation
The material at the center of this process is photosensitive resin, also known as a photopolymer. This is a specially formulated liquid mixture that is engineered to undergo a rapid phase change from liquid to solid upon exposure to a specific wavelength of light. This seemingly magical transformation is the result of a sophisticated and versatile polymer chemistry, with each component of the liquid resin playing a distinct and critical role.
Deconstructing the Chemistry: The Core Components
A typical photosensitive resin is a complex cocktail of several key ingredients:
-
Monomers: These are the smallest and most fundamental molecular "building blocks" within the resin. Monomers are typically low-viscosity, highly reactive molecules that are capable of bonding with other molecules to form long chains. Their primary roles are to reduce the overall viscosity of the resin, allowing it to flow smoothly and quickly between layers during the printing process, and to actively participate in the polymerization reaction.
-
Oligomers: These are larger, more complex molecules that are already partially polymerized, consisting of several monomer units linked together. Oligomers are the primary determinants of the final printed part's mechanical properties. The length and chemical structure of the oligomer chains dictate characteristics such as strength, durability, toughness, flexibility, and thermal resistance. By carefully selecting and controlling the ratio of different oligomers, manufacturers can fine-tune a resin for very specific performance requirements.
-
Photoinitiators: These molecules are the essential "triggers" or catalysts for the entire reaction. When a photoinitiator molecule is struck by a photon of light carrying a specific amount of energy (i.e., a specific wavelength), it absorbs that energy and breaks down, generating highly reactive species known as free radicals or cations. These reactive species then initiate the polymerization chain reaction. The type of photoinitiator used determines the resin's sensitivity to a particular wavelength of light, which is why most standard resins are formulated to react specifically to 405 nm UV light.
-
Additives: Beyond the core components, 3D printing resins contain various additives to modify their properties. These can include pigments for colour, clarifiers for transparent resins, anti-yellowing agents to improve long-term stability, and functional fillers. For example, nanoparticles can be added to increase mechanical strength, or wax can be included in castable resins to ensure they burn out cleanly without leaving ash, a critical requirement for jewelry and casting applications.
The formulation of these resins represents a delicate engineering balance. The ratio of low-viscosity monomers to strength-imparting oligomers is a critical trade-off. A higher concentration of monomers makes the resin less viscous, allowing it to flow easily and enabling faster print speeds, which is crucial for recoating the build area between layers. However, a part made predominantly from simple monomer chains may be brittle. For high-performance applications, the robust, cross-linked network provided by longer oligomer chains is essential for achieving desired toughness and durability. Therefore, resin development is a sophisticated balancing act to create a material that is both highly printable and possesses the required end-use mechanical properties.
The Polymerization Process in Action
When the UV light illuminates the resin, the photoinitiators activate the monomers and oligomers, which then rapidly form strong covalent bonds with one another. This process, known as cross-linking, creates a dense, rigid, three-dimensional polymer network. This network traps the molecules in place, instantly transforming the localized pool of liquid into a solid thermoset plastic—a material that, once cured, cannot be remelted.
This ability to precisely formulate resins is what has enabled the technology to penetrate highly specialized vertical markets. The success of resin 3D printing in fields like medical modelling, and jewelry is as much a testament to advances in material science as it is to hardware innovation. A printer is merely the tool; it is the availability of certified biocompatible, castable, or high-temperature resins that makes these demanding applications possible.
The Role of UV Light: The Catalyst for Layer-by-Layer Curing
The "photo" in photopolymerization refers to light, but not just any light will suffice. The process is initiated by light of a specific wavelength, which corresponds to a precise energy level required to activate the photoinitiator molecules. The vast majority of commercially available desktop and professional resin 3D printers like HeyGears Reflex 3D Printer operate using a light source with a wavelength of 405 nm, which lies at the boundary between visible violet light and the UV-A spectrum.
The control of this light energy is paramount. Both the intensity of the light and the duration of the exposure for each layer must be meticulously calibrated. If the exposure is too short or the light is too weak, the resin will be under-cured, resulting in soft, weak layers that can cause the print to fail. Conversely, suppose the exposure is too long or the light is too intense. In that case, a phenomenon known as "light bleed" can occur, where light scatters beyond the intended area and cures excess resin, reducing the print's detail and dimensional accuracy.
The photochemical curing mechanism unfolds in a rapid, precise sequence:
-
The printer's light source (e.g., an LED array or a laser) emits photons at the 405 nm wavelength.
-
These photons travel through the transparent bottom of the resin vat and strike the photoinitiator molecules within the liquid resin.
-
The photoinitiators absorb the photon's energy, causing their chemical bonds to break and creating highly reactive free radicals.
-
These free radicals immediately initiate the polymerization chain reaction, causing the monomers and oligomers to cross-link and form a solid polymer network.
-
This entire reaction occurs in a matter of seconds, solidifying the resin only in the precise locations illuminated by the light.
One challenge in this process is oxygen inhibition. Atmospheric oxygen can interfere with the reaction by neutralizing the free radicals, particularly at the surface of the resin that is exposed to air. This can result in a tacky, slightly under-cured surface layer. To counteract this, post-curing processes are performed to ensure complete reaction. Curing in water helps scatter light for more uniform exposure and can mitigate surface oxygen inhibition to some degree. For industrial applications requiring absolute control, nitrogen-purged chambers are used to eliminate oxygen inhibition entirely.
This demonstrates that the UV light source and the resin are not independent components but a tightly coupled system. A change in one variable, such as switching to a more opaque resin, necessitates a recalibration of the other, such as increasing the exposure time. Additives like pigments block UV light, meaning a darker resin requires a longer exposure for the photons to penetrate the full layer thickness and properly activate the photoinitiators. This is why users must perform calibration prints for every new resin—even different colours from the same brand—to determine the new optimal settings. This calibrated ecosystem underscores the technical precision required to achieve successful results.
Key Components of a Resin 3D Printer
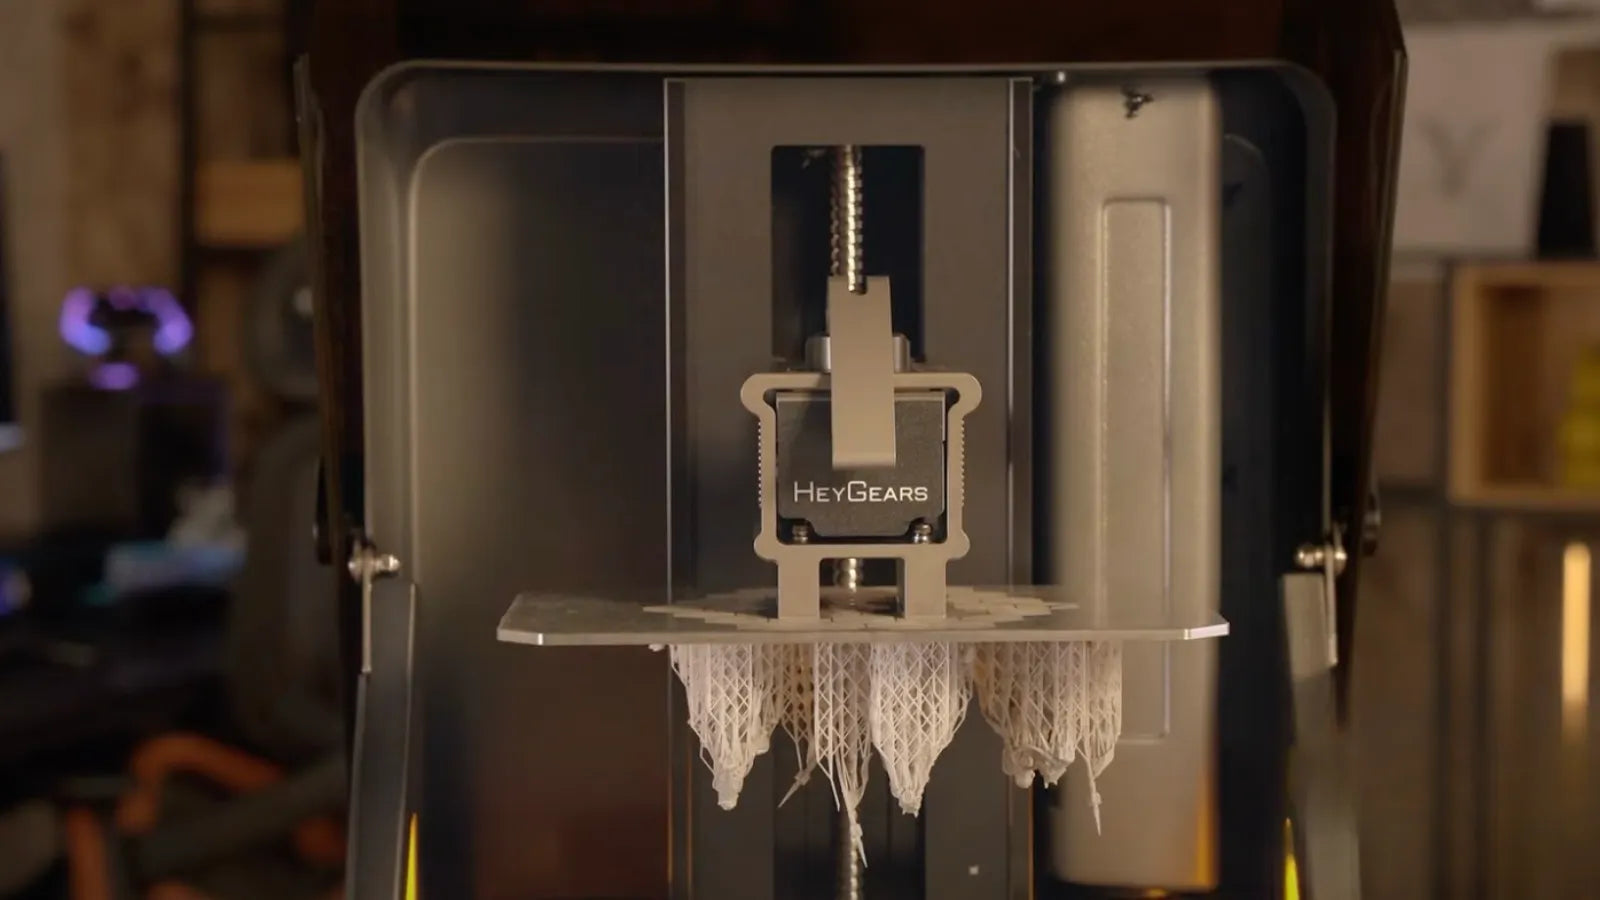
While the specific technologies may vary, most modern resin 3D printers share a common architecture. The most prevalent configuration, particularly for desktop and professional systems, is the "bottom-up" design, where the object is built upside down, suspended from a build platform that gradually rises out of the resin vat. This design is enabled by three core mechanical systems working in perfect synchronization.
The Build Plate: The Foundation for Your Model
The build plate is the solid, typically metal, platform that serves as the foundation for the 3D printed object. It is attached to a gantry on the printer's Z-axis, which allows it to move up and down with exceptional precision. The surface of the build plate faces a critical engineering challenge: it must provide adhesion strong enough to consistently pull the newly cured layer of resin off the bottom of the vat, overcoming significant suction forces, yet it must also allow the user to remove the completed print without damaging it.
To solve this adhesion-versus-removal dilemma, build plate surfaces have evolved from simple, flat machined aluminum to more advanced designs. Many modern printers feature laser-etched or textured surfaces that increase surface area and improve grip on the initial layers. Another popular innovation is the use of flexible magnetic spring steel plates. A magnetic sheet is adhered to the main build plate, and a removable steel plate attaches to it. Once the print is complete, the user can remove the flexible plate and simply bend it, causing the rigid printed part to pop off easily.
Regardless of the surface technology, the single most important factor for success is ensuring the build plate is perfectly leveled relative to the light source and screen. An unlevel plate is one of the most frequent causes of print failure, as it prevents the crucial first layers from adhering uniformly across the entire surface, leading to a failed print before it even truly begins.
The Resin Vat: The Container for the Liquid Material
The resin vat, or tank, is the shallow reservoir that holds the liquid photopolymer during the printing process. While its walls are often made of metal or durable plastic, its most critical component is its transparent bottom. This is not a rigid pane of glass but a thin, taut, and non-stick film, most commonly made from a material called Fluorinated Ethylene Propylene (FEP).
The properties of this FEP film are essential to the "bottom-up" printing process. First, it must be optically clear to the specific wavelength of UV light used by the printer, allowing the energy to pass through unimpeded to cure the resin above it. Second, its non-stick, fluoropolymer surface is designed to facilitate the "peel" process. After each layer is cured, it is temporarily stuck to both the build plate above and the FEP film below. The build plate must then lift, peeling the solidified layer away from the film so that fresh resin can flow in for the next layer. The condition and tension of the FEP film are critical maintenance items; a cloudy, scratched, or loose film can cause print failures and must be replaced.
The Light Source & Screen: The "Digital Brush" that Draws Each Layer
The light engine is the heart of a resin 3D printer and is the primary component that differentiates the main technology types (SLA, DLP, and MSLA). This system is responsible for generating the UV light and shaping it into the precise 2D cross-section of each successive layer. The light source itself is typically either a precision laser (in SLA systems) or a powerful array of UV LEDs (in DLP and MSLA systems).
The method used to shape this light is what defines the technology. In SLA, a system of mirrors called galvanometers directs the laser beam. In DLP, a UV light source illuminates a Digital Micromirror Device (DMD) chip. The individual mirrors on the DMD tilt to either direct light towards the vat to cure the resin or away from it, thus projecting the layer image. In MSLA, a Liquid Crystal Display (LCD) screen acts as a mask for the LED backlight. This shaping mechanism is what effectively acts as the "digital brush," drawing each layer of the object with light.
The entire mechanical operation of a bottom-up resin printer can be viewed as a carefully choreographed battle against physics. The "peel" process, where the build plate lifts the newly cured layer off the FEP film, generates significant suction and adhesion forces. For layers with a large surface area, these forces can be strong enough to warp the part, tear it from its supports, or even pull the entire object off the build plate, resulting in a catastrophic failure. Consequently, many of the advanced settings in slicing software and features in modern printers—such as precisely controlled lift speeds, light-off delays, and sophisticated support structures—are complex strategies designed specifically to manage and mitigate these powerful peel forces. This physical conflict is the central mechanical challenge that the technology must overcome for every single layer it creates.
From Digital to Physical: A Step-by-Step Look at the Workflow
Creating a physical object from a digital file using a resin 3D printer is a comprehensive, multi-stage process. It extends far beyond simply pressing a "print" button and involves careful digital preparation, the automated printing cycle, and mandatory post-processing steps to ensure the final part meets the desired specifications.

Step 1: Preparing the Digital Model with Slicing Software
The journey begins with a 3D digital model, typically in a format like STL or OBJ. This file cannot be sent directly to the printer. It must first be processed by a specialized program called a "slicer." The slicer software acts as the crucial bridge between the 3D geometry and the physical machine, translating the model into a series of 2D image "slices" and a set of machine-readable instructions the printer can execute layer by layer.
Key preparation tasks performed in the slicer include:
-
Orientation: The user must first decide how to orient the model on the virtual build plate. This is a critical strategic decision that profoundly impacts the print's success, duration, and final quality. The orientation determines which surfaces will require support structures, which can leave small marks, and also affects the cross-sectional area of each layer, influencing the peel forces during printing.
-
Support Generation: Because resin printers build objects in a liquid medium, they almost always require support structures. These are fine, tree-like scaffolds that serve two primary purposes: they securely anchor the model to the build plate, and they support any overhanging features or "islands"—parts of a new layer that would otherwise be printed in mid-air with nothing below them. While most slicers offer powerful automatic support generation, experienced users often add or edit supports manually to optimize strength while minimizing contact points on critical surfaces.
-
Hollowing and Drainage: To conserve expensive resin and reduce print time and peel forces, larger models are often made hollow rather than solid. Slicer software makes this easy, but it also necessitates adding one or more drainage holes. These holes are essential to allow uncured liquid resin to escape from the internal cavity during printing and washing. If liquid resin is trapped inside a sealed print, it can slowly release gas, building up internal pressure that may cause the part to crack or even burst over time.
-
Setting Print Parameters: Finally, the user inputs the specific printing parameters for their chosen resin and printer. The most critical of these are the layer height, which defines the vertical (Z-axis) resolution, and the exposure time. Slicers allow for separate exposure settings for the initial "burn-in" layers (which are given a much longer exposure to ensure a rock-solid bond to the build plate) and the subsequent "normal" layers of the model.
Step 2: The Layer-by-Layer Curing Process in Action
Once the model is sliced, the resulting file is transferred to the printer, typically via a USB drive or a network connection. The operator ensures the resin vat is filled to the appropriate level and the build plate is clean and securely attached. The printing process then begins:
-
Initialization: The build plate descends into the vat of resin until it is just a tiny gap—equal to the specified layer height (e.g., 0.05 mm)—away from the FEP film at the bottom of the vat.
-
Burn-in Layers: The light source exposes the cross-section of the first layer for the extended "burn-in" time, curing a solid foundation of resin and bonding it firmly to the build plate surface. This is repeated for the first several layers to guarantee strong adhesion.
-
The Printing Cycle: The printer then enters a repetitive loop that constructs the rest of the object:
-
Exposure: The light engine projects or masks the image for the current layer, and the UV light cures the thin layer of resin for the specified "normal" exposure time.
-
Peel: The light turns off, and the build plate moves vertically upwards, peeling the newly solidified layer off the FEP film.
-
Recoat: The build plate then lowers back down, leaving a gap for the next layer. The movement allows fresh, liquid resin to flow back into the space between the last cured layer and the FEP film.
-
Repeat: This cycle of exposing, peeling, and recoating is repeated, sometimes thousands of times, meticulously building the object one layer at a time until it is complete.
Step 3: Essential Post-Processing - Washing and Curing
When the printer finishes its final layer and raises the build plate, the object is not yet ready for use. It emerges in what is known as a "green" state: it is solid and has its final shape, but the polymerization reaction is incomplete, and the entire part is coated in a sticky film of uncured liquid resin. Post-processing is a mandatory, multi-step procedure required to clean the part, ensure it is safe to handle, and develop its final, optimal material properties.
Washing
The first step is to thoroughly wash the green part to remove all residual liquid resin from its surfaces and any internal cavities.
-
Solvents: The most widely used solvent for this purpose is high-concentration (95% or higher) Isopropyl Alcohol (IPA). Other effective solvents include Tripropylene Glycol Monomethyl Ether (TPM). For specially formulated "water-washable" resins, plain water can be used, though IPA is often still more effective.
-
Methods: While parts can be washed manually by soaking and agitating them in tubs of solvent, this can be messy and inconsistent. Automated washing stations have become the industry standard. These devices submerge the part in a solvent bath and use a magnetic impeller to create a vortex, vigorously flushing the solvent over all surfaces for a thorough and consistent clean. Best practice often involves a two-stage wash: a first bath in "dirty," used solvent to remove the bulk of the resin, followed by a second bath in clean solvent to ensure a pristine finish.

Final Curing (Post-Curing)
After the part has been washed and allowed to completely dry, it must undergo a final curing stage.
-
Purpose: Post-curing exposes the part to additional, intense UV light (and sometimes heat) to complete the polymerization reaction. This final step cross-links any remaining unreacted molecules within the part's structure, which is essential for unlocking the material's maximum mechanical properties, including strength, hardness, temperature resistance, and durability. For biocompatible materials used in medical or dental applications, this post-curing step is mandatory to meet regulatory safety standards.
-
Methods: The most effective method is to use a dedicated curing station. These units are equipped with high-power UV LEDs that emit light at the correct wavelength (e.g., 405 nm), a turntable to ensure uniform, 360-degree exposure, and often a heating element to accelerate the curing process and achieve superior material properties.
This comprehensive workflow reveals that resin 3D printing is not analogous to printing a document; it is fundamentally a form of desktop chemical manufacturing. The process involves handling liquid chemicals and solvents with specific safety protocols, managing a chemical reaction by controlling variables like light and temperature, and properly disposing of hazardous waste like uncured resin and contaminated IPA. The final properties of the part are not inherent upon printing but are developed through a mandatory post-processing chain. This elevates the technology beyond a simple output device and places it firmly in the realm of advanced manufacturing, with significant implications for the training, safety, and environment required for its operation.
How 3D Printing Works Across SLA, DLP, and MSLA
While all resin 3D printers operate on the principle of vat photopolymerization, the term encompasses three distinct core technologies: Stereolithography (SLA), Digital Light Processing (DLP), and Masked Stereolithography (MSLA). The fundamental difference among them lies in the method used to generate and shape the UV light for curing each layer. This distinction has profound consequences for the speed, resolution, cost, and scale of the printing process.
SLA (Stereolithography): Precision via a Focused Laser Beam
Stereolithography is the original resin 3D printing technology. It employs a single, high-precision ultraviolet laser as its light source. The laser beam is directed by a pair of computer-controlled, fast-moving mirrors known as galvanometers. These "galvos" trace the exact path of the object's cross-section, drawing the layer onto the resin surface point by point, much like a pen on paper.
-
Advantages: The primary strength of SLA is its exceptional precision and surface finish. Because the laser spot is extremely fine and it moves along a continuous path, SLA printers can produce parts with incredibly sharp details and smooth, non-pixelated surfaces. The resolution of an SLA printer is determined by the laser spot size and is independent of the overall build volume, meaning a large part can have the same fine detail as a small one.
-
Disadvantages: The main trade-off for this precision is speed. Since the laser must physically trace every detail of each layer, the printing time is directly proportional to the complexity and surface area of the model on that layer. Large, solid objects can take a very long time to print. The mechanical complexity of the laser and galvanometer system also makes SLA printers generally more expensive than their counterparts.
DLP (Digital Light Processing): Projecting an Entire Layer at Once
Digital Light Processing technology takes a different approach. Instead of a laser, a DLP printer uses a digital light projector to flash an image of the entire layer onto the bottom of the resin vat simultaneously. This image is created by a semiconductor chip called a Digital Micromirror Device (DMD), which is covered in millions of microscopic mirrors. Each mirror corresponds to a pixel in the projected image and can be individually tilted to either reflect light towards the resin or away from it, thus forming the precise pattern of the layer in a single flash.
-
Advantages: The standout benefit of DLP is speed. Because an entire layer is cured at once, regardless of how simple or complex it is, the print time is determined almost exclusively by the height of the object (the number of layers) and the curing time per layer. This makes DLP significantly faster than SLA, especially when printing multiple objects at once or a single large, dense object.
-
Disadvantages: The resolution of a DLP printer is defined by the projector's native pixel count (e.g., 1920x1080). The image is composed of rectangular pixels, which are extruded vertically to form three-dimensional pixels called "voxels". This can sometimes result in visible voxel lines on curved surfaces. Furthermore, there is a direct trade-off between build volume and resolution. For a projector with a fixed number of pixels, increasing the size of the projected image (to create a larger build area) means each individual pixel becomes larger, thereby reducing the XY resolution of the print.
MSLA (Masked Stereolithography): Using an LCD Screen as a Photomask
Masked Stereolithography, often referred to simply as LCD 3D printing, has become the dominant technology in the consumer and prosumer markets. An MSLA printer uses a powerful array of UV LEDs as a constant, uniform backlight. Positioned directly above the LEDs and below the resin vat is a high-resolution Liquid Crystal Display (LCD) screen.

This LCD acts as a dynamic photomask. For each layer, the screen displays a black-and-white image: the pixels corresponding to the object's shape become transparent, allowing the UV light to pass through and cure the resin, while all other pixels remain opaque, blocking the light.
-
Advantages: MSLA technology effectively combines the primary advantages of its predecessors: it achieves the high speed of DLP by curing an entire layer at once, but at a significantly lower cost. High-resolution LCD screens and UV LEDs are mass-produced components for other industries, making the hardware far more affordable to manufacture. This combination of speed and affordability has been instrumental in the widespread adoption of resin 3D printing.
-
Disadvantages: The primary drawback is that the LCD screen is a consumable component. The constant exposure to intense UV light eventually degrades the liquid crystals, and the screen must be replaced after a certain number of operating hours. Additionally, like DLP, the resolution is fixed by the pixel density of the LCD screen and cannot be changed without replacing the hardware.
To clarify these distinctions, the following table provides a direct comparison of the three technologies:
|
Feature |
SLA (Stereolithography) |
DLP (Digital Light Processing) |
MSLA (Masked Stereolithography) |
|
Light Source |
UV Laser |
Digital UV Projector |
UV LED Array |
|
Image Generation |
Galvanometer-controlled mirrors |
Digital Micromirror Device (DMD) chip |
LCD Photomask |
|
How It Works |
A laser "draws" the layer path point-by-point. |
The projector flashes a complete image of the layer at once. |
The LCD masks the LED backlight, exposing a full layer at once. |
|
Key Advantage |
Highest precision, smoothest surface finish, no voxel lines. |
Very fast print speed, independent of layer complexity. |
Fast print speed at a much lower hardware cost. |
|
Key Disadvantage |
Slower print speed, especially for large/solid parts. |
Resolution is inversely proportional to build volume. |
LCD screen is a consumable part; fixed pixel resolution. |
|
Typical Application |
High-detail prototyping, master patterns, medical models. |
Digital dentistry, rapid prototyping, low-run manufacturing. |
Prosumer/hobbyist printing, professional prototyping. |
Conclusion: The Future of High-Resolution Manufacturing
Resin 3D printing, or vat photopolymerization, stands as a powerful and versatile additive manufacturing process. Its operation is a sophisticated interplay of materials science, optics, and mechanical engineering, rooted in the fundamental chemical reaction of photopolymerization. By precisely controlling UV light to solidify a liquid resin layer by layer, this technology achieves a level of detail and surface quality that is often unattainable with other methods. The journey from a digital concept to a physical object is a complete manufacturing workflow, involving meticulous preparation in slicer software, the automated printing cycle, and a mandatory post-processing sequence of washing and curing to achieve the final, high-performance material properties.
The evolution of the technology from the original, laser-based SLA to the faster, projector-based DLP, and finally to the highly accessible and cost-effective MSLA (LCD) systems, illustrates a clear trajectory of innovation. Each advancement has broadened the technology's reach, driven by continuous improvements in speed, resolution, reliability, and, critically, material science.
Related articles:
How Does A Resin 3D Printer Work
Different Types of 3D Printer Consumables: Resin vs FDM
Reflex RS Turbo: All-New Precise, Fast Resin 3D Printer 2025
How to make 3D printed models: A Beginner's Guide
共有:
HeyGears Resin 3D Printer Design Concepts and Inspirations
Resin 3D Printers: How Much Do They Typically Cost?