

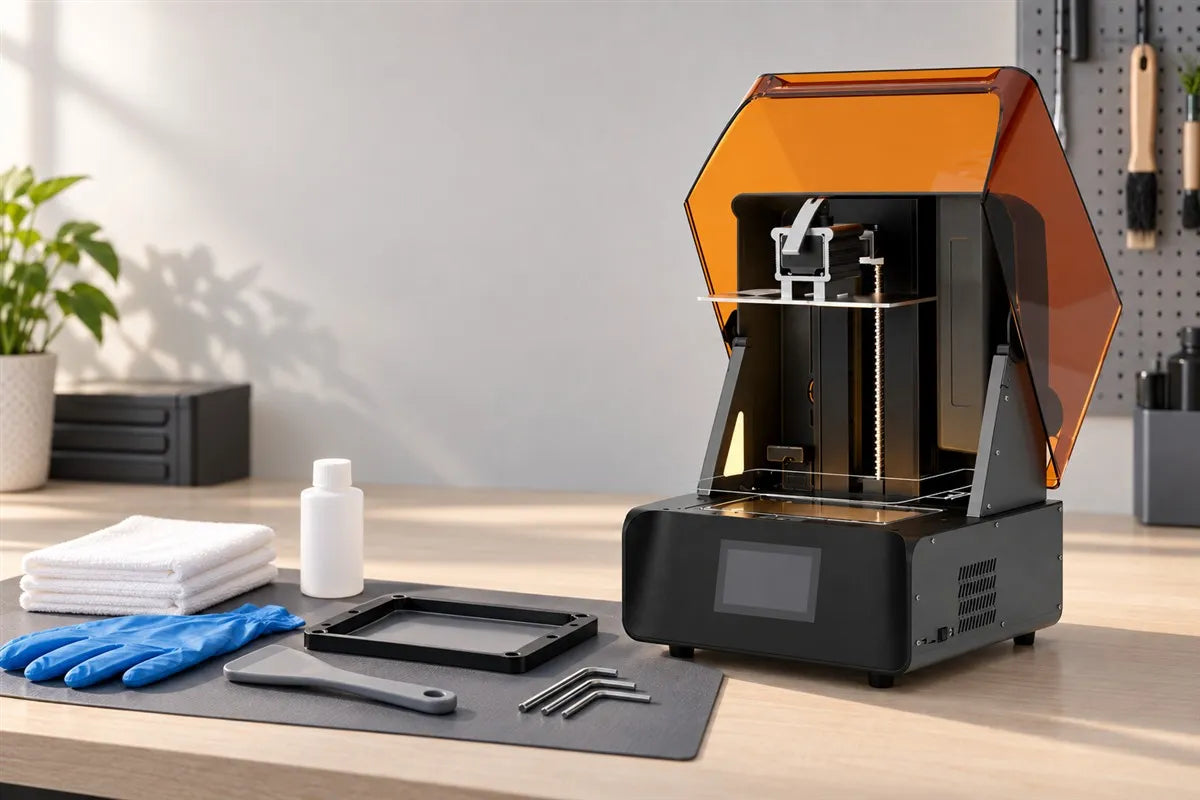
Good 3d printer maintenance starts with regular inspection. Check for resin leaks, hardened debris, plate contamination, and unusual movement before they become a failed build or damaged component. Keep a small cleaning kit and the correct release-film spare ready, then replace worn parts based on their condition and the manufacturer's guidance.
This guide focuses on resin printer maintenance, including what to buy, how often to check each area, how to store resin, and when an LCD screen actually needs attention. The schedule below is a practical starting routine, not a manufacturer-mandated service interval. Increase inspection frequency for heavy use and follow your model's manual whenever it specifies a different procedure.
BEFORE EACH BUILD
Inspect the print path
Plate, tank, visible film condition, resin, and external leaks.
WEEKLY / MONTHLY
Review the system
Clean accessible surfaces, check motion, and review wear records.
WHEN CONDITION REQUIRES
Replace the right part
Film, protector, and LCD have different jobs and failure signs.
Your Regular Maintenance Schedule
Do not dismantle a working 3d printer every day. Use the routine below to decide what needs a closer look. Whenever a tank must be removed, follow the printer's instructions and contain resin before lifting it.
| When | What to check | What to do |
|---|---|---|
| Before every print | Plate attachment; cured debris; tank seating; resin condition; signs of leakage | Remove obstructions, confirm the right resin/profile, and resolve leaks before starting |
| After every print | Completed model; missing features; spills; remaining fragments | Drain and remove the part as directed; investigate missing material; close resin containers |
| Weekly while in use | Tank/film condition, accessible vents, plate mount, wash supplies | Inspect at a suitable tank-cleaning opportunity; remove external dust; replenish supplies |
| Monthly while in use | Z-axis condition; recurring defects; usage records; spare compatibility | Review service needs; lubricate only when due under the manufacturer's procedure |
| After a failure or spill | Tank bottom, film damage, screen contamination, resin ingress | Stop and inspect before another build; seek service for liquid inside the machine |
| Before extended downtime | Resin storage limits; exposed residue; tank condition | Recover suitable resin as directed; clean, dry, and cover the equipment |
01 / WHAT TO BUY Build a Small, Purposeful Maintenance Kit
Buy items that match your resin, cleaning method, and printer. A cleaner approved for washing prints is not automatically suitable for the LCD surface, hood, seals, or motion components.
Keep these everyday supplies on hand
- Appropriate protective gloves and splash goggles: choose chemical compatibility from the resin and cleaner safety data sheets. Disposable nitrile gloves are commonly used; replace them when contaminated or damaged.
- Separate lint-free wipes and clean optical cloths: reserve the cleanest cloths for the screen surface. Do not reuse resin-soaked cloths on optical parts.
- Manufacturer-approved cleaner: buy the specified type and concentration for each surface; keep containers closed and avoid spraying into the printer.
- Compatible resin filters, a funnel, and opaque storage containers: use the specified filter grade and clear identification labels.
- A resin-resistant work mat and catch tray: contain drips while handling the tank and plate.
- Approved removal and mixing tools: a plate-removal tool and a film-safe tool have different purposes. Never use a sharp plate scraper on release film or an LCD.
- The correct hex keys or drivers: often supplied with the printer; check before buying duplicates.
- Labeled waste containers: separate resin-contaminated liquids and consumables according to local handling requirements.
Keep one compatible wear spare if downtime matters
A replacement release-film set or preassembled film module is a useful first spare. Match it to the exact tank configuration. A compatible screen-protection kit can also be useful if your screen assembly supports separate replacement. Keep spares flat, protected, and in their original packaging.
Buy service parts when there is a reason
An LCD, spare build platform, or complete tank may make sense for frequent production, but these are not mandatory monthly purchases. Confirm the fault and compatibility before ordering. For Z-axis servicing, obtain the lubricant specified for the machine; do not choose a general spray oil simply because it is available.
02 / CLEANING & MOTION Clean Each Surface for Its Actual Job
Printer cleaning: control drips before they spread
For physical cleaning and servicing, power down and disconnect the machine as instructed. Deal with spills promptly using the approved method. Keep solvent away from connectors, openings, fans, and the motion mechanism. Do not soak the hood or touchscreen: materials that tolerate a quick wipe may not tolerate prolonged contact.
Build plate maintenance: inspect before sanding
Remove prints with the platform securely supported, then check for cured residue, raised burrs, contamination, and damage. Clean as directed and let the platform dry before returning it to service. Confirm that its mounting surfaces and lock are clean and correctly seated.
A poor first layer does not automatically mean the plate needs sanding or re-leveling. Check the resin profile, surface cleanliness, attachment, and other documented causes first. Abrading a factory-finished platform or adjusting a pre-set mount unnecessarily can introduce new problems. Replace or service a damaged platform when its condition prevents dependable attachment or printing.
Screen cleaning: use minimal liquid and pressure
Identify the top surface before cleaning it: it may be a replaceable protector rather than the LCD itself. Remove loose contamination gently with approved materials. Never scrape with a metal blade, peel an unidentified optical layer, or flood the screen edges.
For small resin spots on the Reflex RS screen, HeyGears describes gently wiping with a cloth lightly moistened with 95% alcohol, while preventing liquid ingress. Confirm that guidance against your RS Turbo's current screen/protector configuration before using it. Larger spills or suspected internal leakage need support assistance. This is surface-specific advice, not permission to use alcohol on every printer component. RS/RS Turbo English manuals and support hub.
Z-axis maintenance: inspect first, lubricate when required
Look for debris, resin contamination, abnormal noise, uneven movement, and visible changes in lubricant condition. During normal powered operation, observe motion without touching the mechanism. Perform hands-on maintenance only in the powered-down state specified by the manual.
Use the recommended lubricant, quantity, and application points when service is due. Avoid mixing lubricants or coating belts, sensors, and optical surfaces. Do not force the carriage by hand. HeyGears specifically warns against washing a resin-contaminated screw directly with cleaning agent because of corrosion risk; follow its cleanup and lubrication guidance instead. Find RS/RS Turbo English service resources.
03 / RELEASE FILM When Should You Replace the Release Film?

The film at the bottom of the tank experiences repeated release cycles. Its life depends on film type, cross-sections, material, settings, handling, and accidental damage. A small damaged area can matter more than the number of months since installation.
Stop and replace / service
- A puncture, tear, or confirmed leak
- Severe creasing, stretching, or damaged sealing surfaces
- A damaged film/frame that cannot be made serviceable by the approved procedure
Inspect and diagnose
- Increasing cloudiness or scratches
- Changes in release behavior
- Repeated localized failures after resin, support, and exposure checks
Inspect safely when the tank is drained or during the manufacturer's prescribed check. Slight marks do not automatically require replacement, and not all films look equally clear when new. Compare against the condition expected for that exact film. Never continue printing through a suspected leak to finish one more job.
A safe replacement sequence
- Identify the tank. Standard and pulsing-release assemblies may require different film sets, frames, and procedures.
- Recover suitable resin. Remove the supply bottle or cartridge as directed, then empty and clean the tank over a protected work area.
- Inspect the frame and seals. Damage outside the film may require more than a film replacement.
- Install the specified spare. Follow the exact instructions for orientation, screw sequence, tension, torque, and any removable packaging layers. A preassembled module must not be treated like loose generic film.
- Complete the specified checks. Verify seating and sealing using the maker's method before returning the tank to the printer.
- Validate with a small job. Record the installation date and usage counter, if available, and inspect the first result.
Do not substitute a generic film based only on its outside dimensions or use a universal tension-by-sound rule. Use the RS/RS Turbo manuals and tutorial hub for your exact configuration.
04 / RESIN STORAGE Store Resin Sealed, Identified, and Away From Light
Use the original opaque bottle where appropriate, close the cap immediately after use, and store it upright in a dedicated area with secondary containment. Preserve the product name, batch number, expiry date, and opening date. Keep resin away from direct sunlight, heat, moisture, food, children, and pets.

What temperature should resin be stored at?
Use the range on the bottle, technical data sheet, or safety data sheet. Storage and printing temperatures are different specifications, and no single range applies to every resin. For example, HeyGears' PAP10 Black guide specifies indoor storage at 15–28°C and lists an 18-month shelf life. Those figures apply to that material, not the whole resin category. PAP10 Black storage instructions.
Can resin stay in the tank between prints?
Sometimes, within the manufacturer's stated conditions and with the printer protected from light and contamination. For PAP10 Black, HeyGears advises filtering it back into its bottle if not printing for three days and avoiding more than seven days in the tank. Follow the instructions for the resin you actually use rather than treating that example as a universal deadline.
Before reuse, mix or stir as instructed and allow bubbles to settle as needed. Filter recovered resin using a clean, compatible setup. If the material is contaminated with wash liquid, contains abnormal gel, or is no longer suitable for use, filtration alone will not restore it. Do not mix different resins or return uncertain material to a fresh bottle.
Keep resin-contaminated water and solvent out of drains, including wash liquid from water-washable resin. Use the material safety data and local disposal route for unusable resin and cleaning waste.
05 / LCD REPLACEMENT How Often Does a Resin Printer LCD Need Replacing?
THE PRACTICAL ANSWER
There is no universal six-month or annual replacement rule. Replace the LCD when a confirmed screen fault or the manufacturer's service instructions require it.
An LCD's working life depends on its design, exposure use, heat management, operating environment, and damage. Calendar age alone cannot tell you whether it is healthy. A warranty period is also not a predicted lifespan.
For RS Turbo, HeyGears advertises its Amber Screen as capable of over one million printed layers. Treat that as a manufacturer capability claim, not a guaranteed replacement interval or a number of calendar years. Layer counts, powered-on hours, and UV exposure hours are different measures. RS Turbo official screen information.
Signs that justify an LCD check
- Unwanted lines, patches, or missing areas in the manufacturer's exposure test pattern
- Repeated defects at the same screen position across otherwise validated jobs
- A cracked screen, liquid ingress, or visible screen damage
- Exposure irregularities that remain after checking the tank, protector, resin, and settings
Use only the documented diagnostic procedure and avoid looking directly at UV light. A blank exposure result can also come from the light source, connection, or control system; it does not prove that the LCD alone has failed. Invasive checks belong in the service procedure.
Check the protector before buying an LCD
A scratched, contaminated, or cloudy replaceable protector can affect the optical path while the LCD beneath remains functional. Identify which layer is damaged and whether that layer is serviceable. Never peel a factory optical or polarizer layer thinking it is disposable packing film.
If replacement is needed, order the exact screen assembly and required tape or calibration components for the machine. Follow the installation and calibration procedure, then validate the exposure and a small print before returning to production. Official RS Turbo / RS Amber Screen options.
KEEP A SIMPLE SERVICE RECORD
What to Note After Maintenance
Date · printer and tank configuration · resin and batch · observed issue · cleaning or part replaced · usage counter · validation result.
A short record helps distinguish normal film wear from recurring exposure or motion problems and makes support requests more useful.
Frequently Asked Questions
Do I need to empty the tank after every print?
Not necessarily. Follow the resin's storage guidance and inspect after failures. Routine unnecessary transfers can introduce contamination, but extended storage in the vat may also degrade the material.
Should I clean the LCD after every job?
Check for contamination, especially after spills or tank removal. A clean protected screen does not need repeated rubbing. Clean only as required with the approved method.
Should I lubricate the Z-axis every month?
Use a monthly inspection as a reminder to check its condition. The lubrication interval, lubricant, and application method must come from the machine's service instructions.
What spare should I buy first?
For many users, a compatible release-film set or module is the most useful wear spare. Confirm the tank type first. Buy an LCD based on a diagnosed need or a deliberate production-spares plan.
Is release film the same as screen-protection film?
No. Release film forms the tank's bottom interface; screen protection sits over the optical display surface. They are not interchangeable.
Consistent 3d printer maintenance protects more than parts: it helps you catch the small changes that lead to lost builds. Keep your resin 3d printer clean, store its material correctly, and let documented checks guide replacement decisions.
Share:
How to Print High Detail Miniatures: Complete Resin 3D Printing Workflow
How to Make 3D Prints Stronger: Materials, Design, and Printing Settings?